
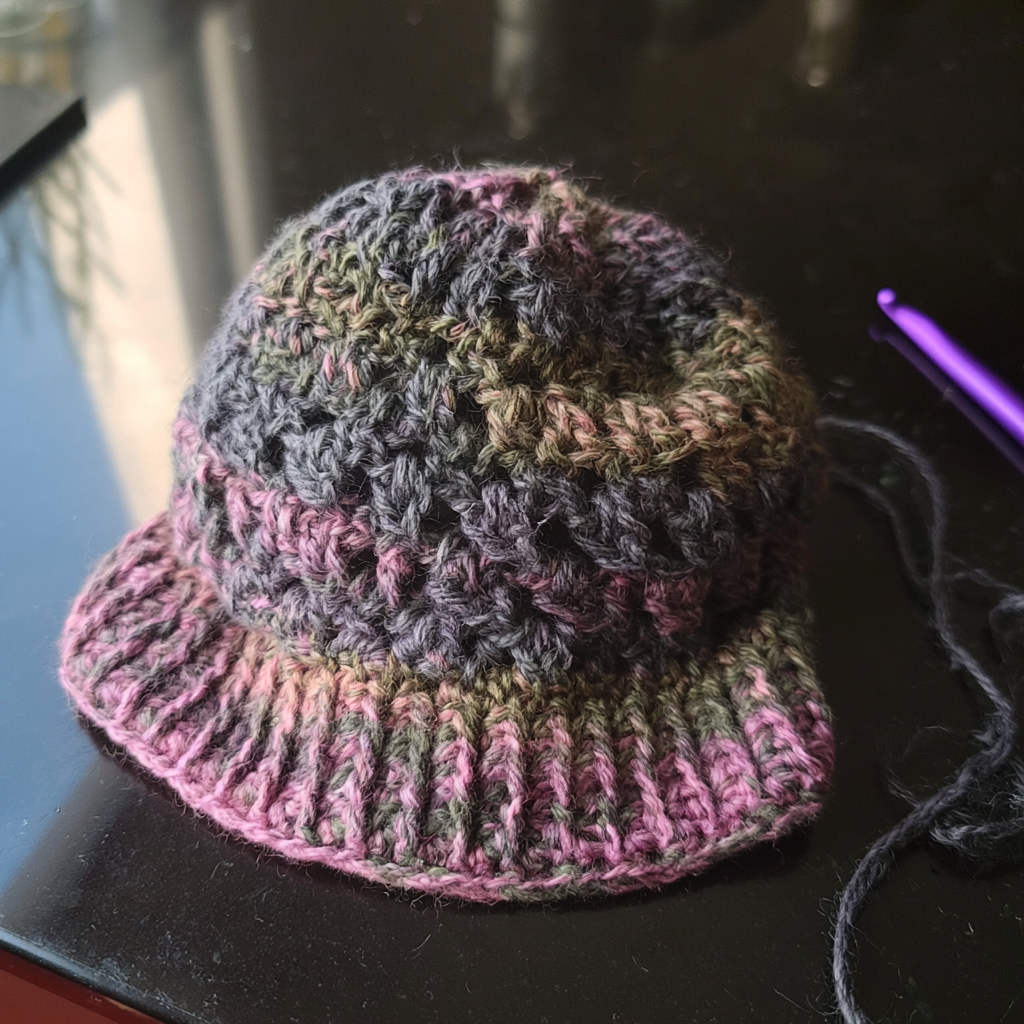
Hello, fellow crocheters! Emma here, and I’m so excited to share a pattern that’s been a long-time favorite of mine: the Mandala Tam. This isn’t just any hat; it’s a stylish and practical accessory that I’ve relied on for years to keep my hair comfortably tucked away, whether it’s damp, unruly, or I just don’t feel like fussing with it.
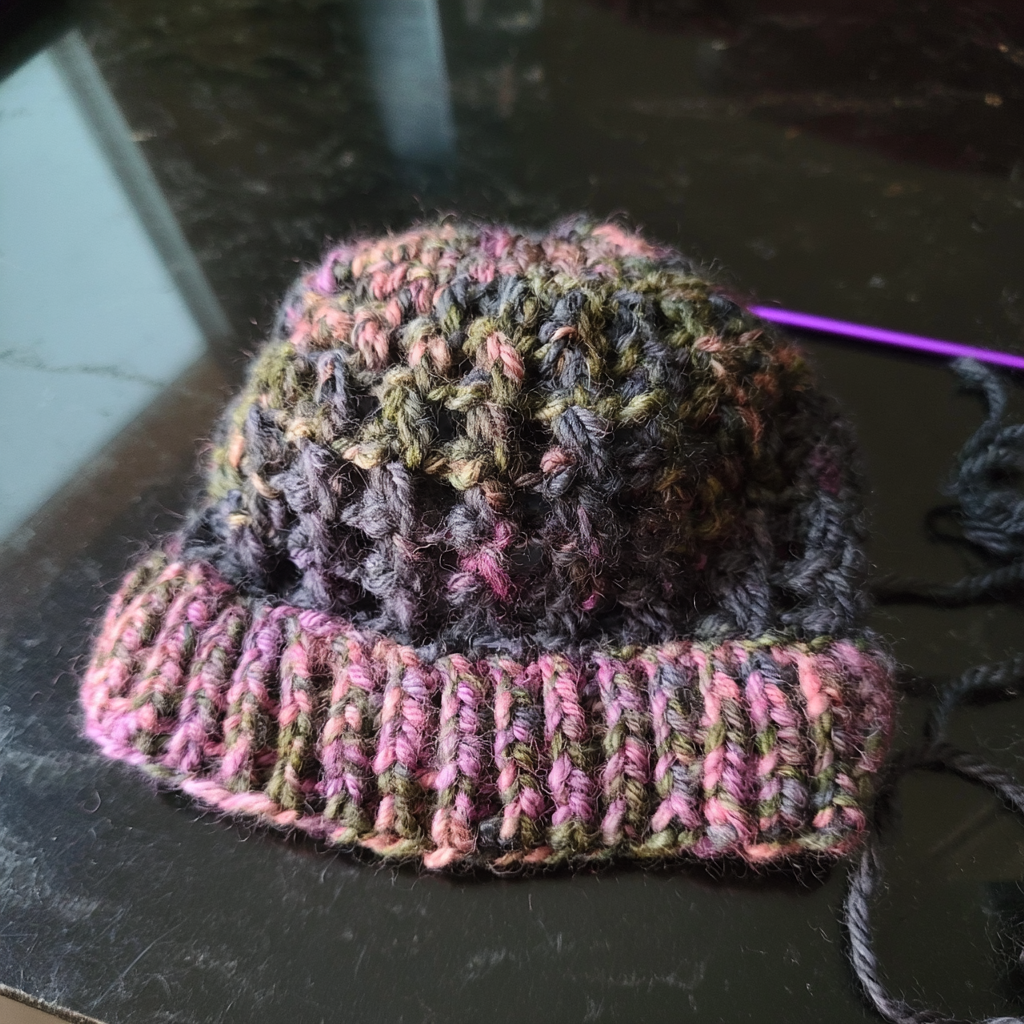
I absolutely adore the unique, netted look of this tam, which gives it a beautiful, mandala-like appearance. It’s a fantastic project for anyone looking for a quick and satisfying make, even if you’re relatively new to crochet. The pattern uses common stitches and clever construction to create a wonderfully slouchy hat that’s perfect for all hair types and lengths. Plus, you can customize it with an optional button and strap accent for an extra touch of charm. Let’s get started on making your new favorite tam!
Mandala Tam Crochet Pattern
Materials
- 5.00 mm hook
- 6.50 mm hook (optional, for button & strap decoration)
- Yarn: Any #4 weight yarn, approximately 200 yards.
- Recommended yarn: Red Heart Unforgettable (100 g / 270 yds, 100% acrylic) or Lion Brand Landscapes.
Finished Size
This hat design comes in two sizes, Small and Large. The brim size is the same for both, but the depth varies to accommodate different hair volumes.
- Small (Somewhat Slouchy): 22” brim, 8-9” depth, 8” diameter laid flat.
- Large (Very Slouchy): 22” brim, 11-12” depth, 10.5” diameter laid flat.
Yarn Information
- Yarn Weight: #4 weight yarn
- Yardage: Approximately 200 yards
- Recommended Brands: Red Heart Unforgettable, Lion Brand Landscapes
Hook and Tools
- Crochet Hooks: 5.00 mm, 6.50 mm (optional)
- Tapestry needle (for weaving in ends)
- Scissors
- Button (optional, for strap accent)
Abbreviations
- ch — chain
- dc — double crochet
- sc — single crochet
- hdc — half double crochet
- FPDC — front post double crochet
- BPDC — back post double crochet
- sl st — slip stitch
- sp — space
- st(s) — stitch(es)
- dc3tog — double crochet 3 together
Pattern Notes
- Stitch and row counts are written with changes for Large following Small, as follows: small count/row [large count/row].
- Sometimes instructions are specified for only one size, as in “[Large ONLY]”.
- Where no changes are specified, counts and instructions apply to all sizes.
- The initial chain for Round 1 (ch 5) counts as an initial chain, plus a dc + ch 1.
- The ch 3 at the beginning of Round 4 (and subsequent dc rounds) counts as the first dc.
- The ch 2 at the beginning of post stitch rounds does NOT count as a stitch.
Gauge
- Main Gauge: 3 ½” in diameter (edge to edge measured across the center) at the end of Rnd 3.
- Post Stitch Gauge: 6 sts = 2” in FPDC/BPDC pattern.
- Make sure to check your gauge and use the hook size needed to obtain the listed gauge.
Special Stitches
- Post Stitches (FPDC/BPDC): These stitches are worked around the post of the stitch from the previous round rather than into the top loops. For FPDC, insert your hook from front to back around the post of the stitch, then complete a dc. For BPDC, insert your hook from back to front around the post of the stitch, then complete a dc.
- Chain and Stitch Join: A technique using a combination of chain stitches and regular crochet stitches to form the last loop of a mesh round. This positions your hook at the middle of the space for the next round.
Instructions
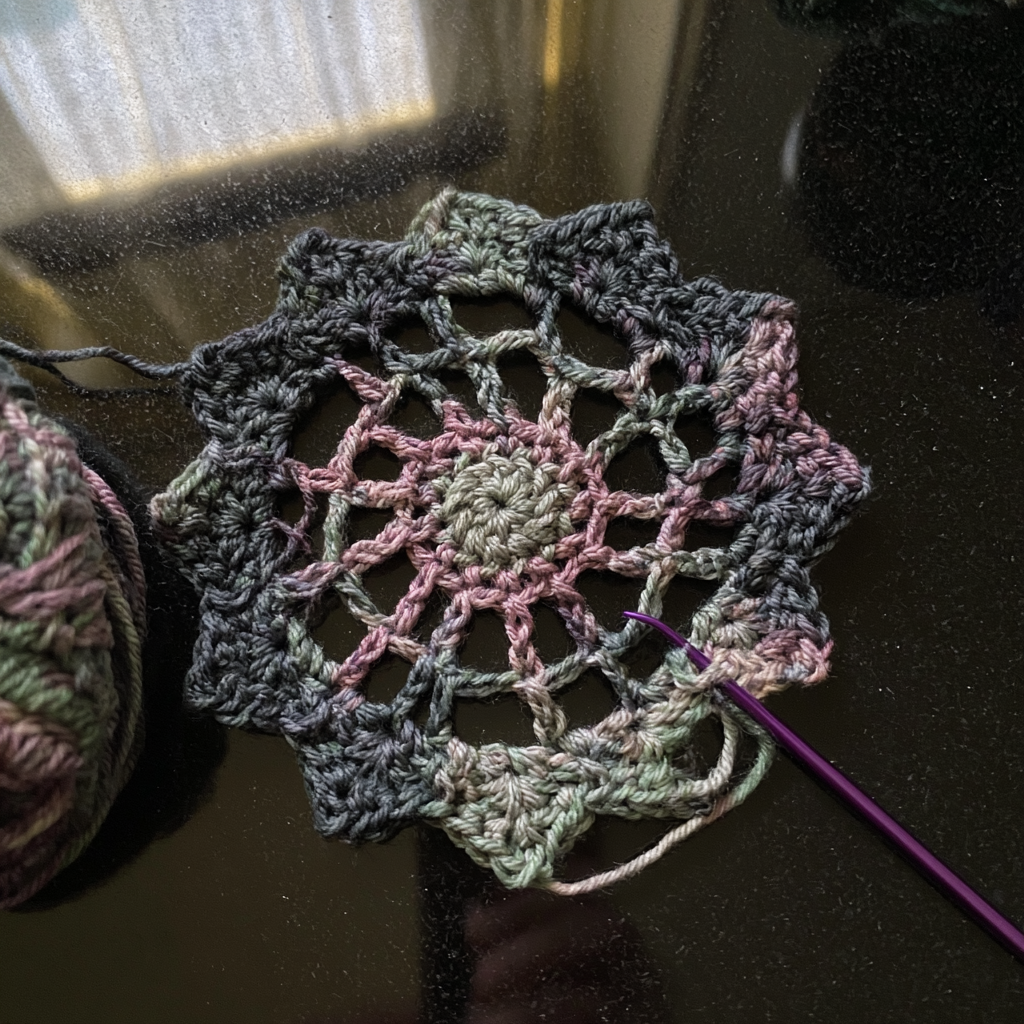
With 5.0 mm hook, Ch 5 (counts as initial chain, plus dc + ch 1)
Round 1: (Dc, ch 1) 11 times into the 5th ch from the hook. Join with a sl stitch into the 3rd ch of beginning ch4. (12 dc, 12 ch-1 sps)
Round 2: (Sc into the next ch-1 space, ch 4) 11 times. Sc into the next ch-1 space, ch 2. Hdc into the first sc of the round. (12 loops)
Round 3: Sc in the same space, ch 4. (Sc in the next ch-4 space, ch 4) 10 times. Sc in the next ch-4 space, ch 2. Hdc in the first sc of the round. (12 loops)
Round 4: Ch 3 (counts as first dc). Dc in the same space, ch 4. (2 dc in the next ch-4 space, ch 4) 10 times. 2 dc in the next ch-4 space, ch 2, hdc in the 3rd chain of beg ch-3. (24 dc, 12 ch-4 sps)
Round 5 [Large Size ONLY]: Ch 3 (counts as first dc). Dc in the same space 2 times, ch 4. (3 dc in the next ch-4 space, ch 4) 10 times. 3 dc in the next ch-4 space, ch 1, dc in the 3rd ch of beg ch-3. (36 dc, 12 ch-4 spaces)
Round 5 [6]: Sc in the same space, ch 5. (Sc in the next ch-4 space, ch 5, sc in the same space, ch 5. Sc in the next ch-4 space, ch 5) 5 times. Sc in the next ch-4 space, ch 5, sc in the same space, ch 2. Dc in the first sc of the round. (18 ch-5 loops)
Round 6 [7]: Sc in the same space, ch 5. (Sc in the next ch-5 space, ch 5) 16 times. Sc in the next ch-5 space, ch 2. Dc in the first sc of the round. (18 ch-5 loops)
Rounds 7-9 [Small ONLY]: Repeat Round 6. (18 ch loops)
Round 8 [Large ONLY]: Sc in the same space, ch 5. (Sc in the next ch-5 space, ch 5, sc in the same space, ch 5. Sc in the next ch-5 space, ch 5) 8 times. Sc in the next ch-5 space, ch 5, sc in the same space, ch 2. Dc in the first sc of the round. (27 ch-5 loops)
Rounds 9-11 [Large ONLY]: Sc in the same space, ch 5. (Sc in the next ch-5 space, ch 5) 25 times. Sc in the next ch-5 space, ch 2. Dc in the first sc of the round. (27 ch loops)
At the end of Rnd 8, the diameter should be about 8” for small and 9” for large.
Round 10 [12]: Sc in the same space, ch 4. (Sc in the next chain space, ch 4) 16 [25] times. Sc in the next chain space, ch 1, dc in the first sc of the round. (18 [27] ch-4 loops)
Rounds 11-13 [13-15]: Repeat Round 10 [12].
Round 14 [16]: Sc in the same space, ch 3. (Sc in the next chain space, ch 3) 16 [25] times. Sc in the next chain space, ch 1, hdc in the first sc of the round. (18 [27] ch-3 loops)
Round 15 [17]: Repeat Round 14 [16].
Round 16 [Smalls Only]: Ch 3 (counts as first dc). Dc in the same sp. (Dc in the next sc, 3 dc in the next ch-3 space) 17 times. Dc in the next sc, 1 dc in the next chain space. Join with a sl stitch to the 3rd ch of beg ch-3. (72 Dc)
Round 18 [Larges Only]: Ch 3 (counts as first dc). Dc in the same sp. (3 dc in the next ch space, 2 dc in the next ch space) 13 times. 1 dc in the next ch space, the first space of the round. (68 Dc)
Round 17 [19]: Ch 2 (does not count as first dc), FPDC in the same stitch. 1 FPDC in each of the next 2 sts. (1 BPDC in each of the next 3 sts, 1 FPDC in each of the next 3 sts) 11 times. [Smalls ONLY: 1 BPDC in each of the next 3 sts.] [Larges ONLY: 1 FPDC in each of the next 2 sts.] Join with a sl st in the top of the first FPDC of the round.
Round 18 [20]: Repeat Round 17 [19].
Round 19 [21]: Sc in each stitch around. Note: If the hat brim is too loose, substitute a slip stitch in place of the single crochet, or sl st as an additional row after the sc row is complete.
Finishing
Cut yarn and tie off, leaving a long tail for sewing if you’re adding a button. Weave in all remaining ends.
Assembly (Optional Button & Strap Accent)
If adding the button and strap accent:
- Position the button over the join stitches where the beginning and end of the last round meet and sew it on using the yarn tail.
- Strap: With a 6.50 mm hook, join new yarn into the side of the post stitches 15 stitches away from the button.
- Row 1: 2 dc in the side of the first stitch, 1 dc in the side of the next st, 1 dc in the side of the next st.
- Rows 2-4: Ch 3, turn. Dc in the next 4 stitches.
- Row 5: Ch 3, turn. Dc3tog over the next 3 sts. Dc in the last st.
- Row 6: Turn without chaining, slip st in the next 2 sts.
Cut yarn and tie off. Weave in all ends. Use the spaces between the double crochet stitches on the strap to slip over your button and tighten the hat as necessary.
Emma’s Tips
I find that using a yarn with a slight sheen or a variegated colorway really makes the mandala pattern pop for this tam. Don’t be afraid to play with different color combinations! Also, checking your gauge, especially for the main body rounds, is key to getting the right slouchy fit. If your hat feels a bit too tight or loose in the early rounds, adjust your hook size before you get too far. This pattern is designed to be forgiving, but good tension makes all the difference for that beautiful drape.
FAQ
-
What kind of yarn should I use for this tam?
The pattern calls for any #4 weight yarn. The original pattern designer recommended Red Heart Unforgettable or Lion Brand Landscapes, which are both known for their beautiful color variations and soft feel.
-
How do I make the tam fit tighter around the brim?
If your hat brim feels too loose, you can substitute a slip stitch for the single crochet in the final Round 19 [21], or add an additional row of slip stitches after completing the single crochet round.
-
What if I don’t want to add the button and strap?
The button and strap are completely optional! If you choose not to add them, you won’t need the 6.50 mm hook. Simply finish the hat after Round 19 [21] by cutting the yarn and weaving in all ends.