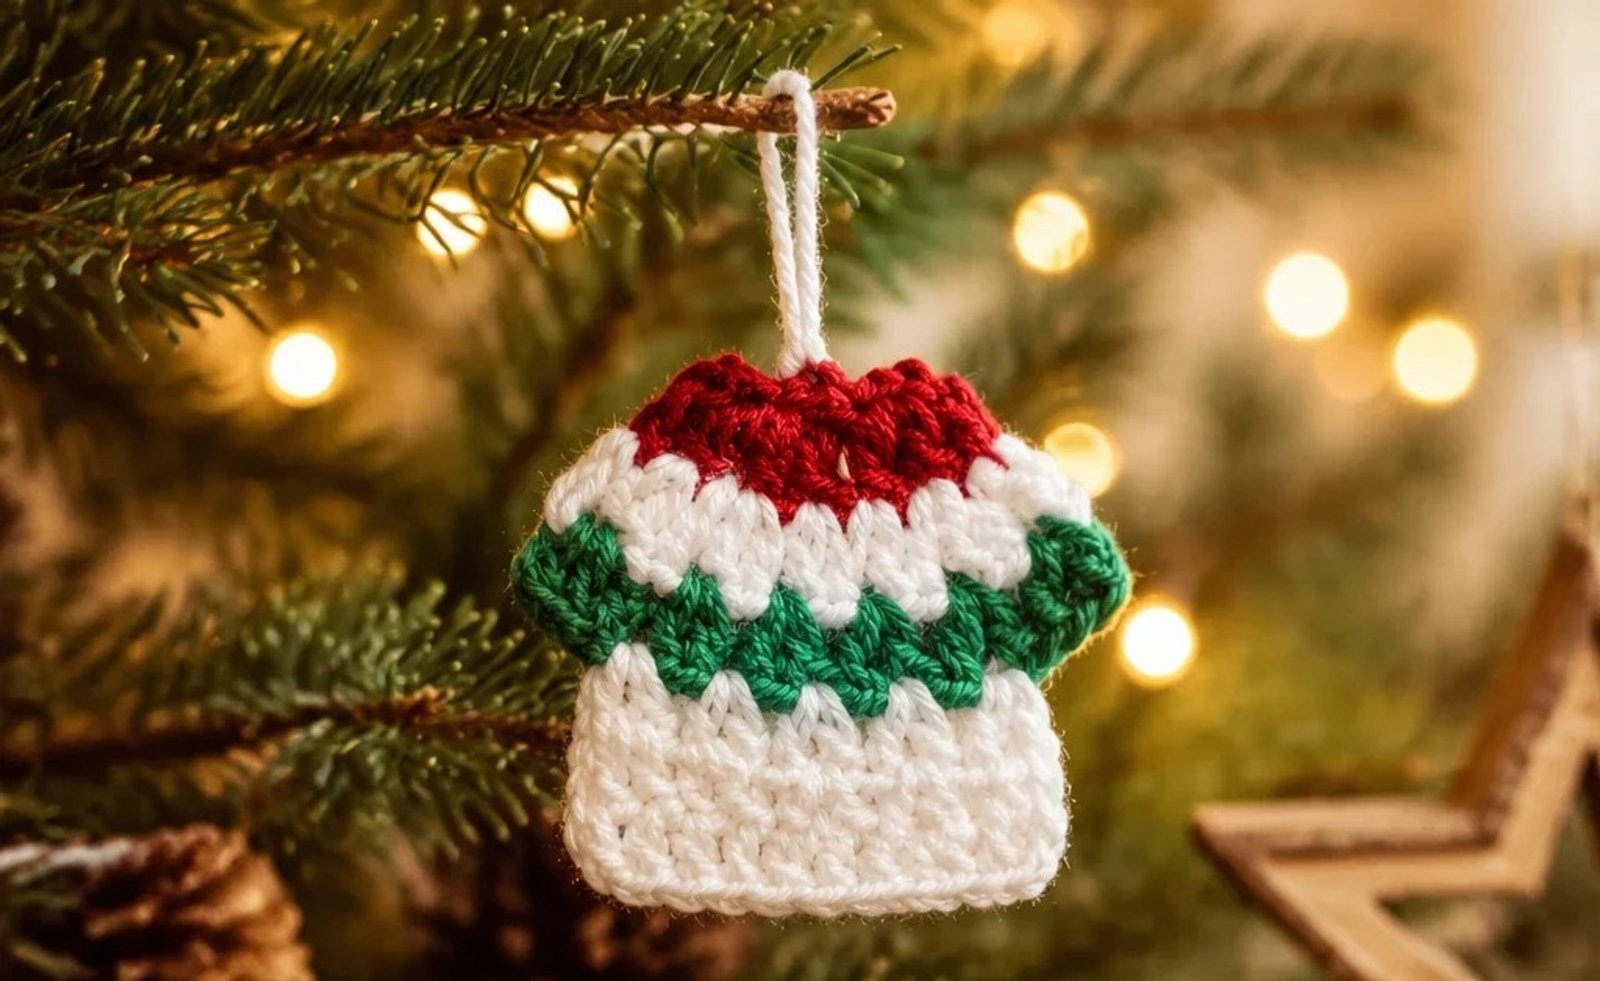
Hello, fellow makers! Today, I’m so excited to share a project that brings a little extra handmade charm to your holiday decor: adorable tiny crochet sweater ornaments. These aren’t just any ornaments; they’re miniature works of art, complete with sleeves, a ribbed collar, and a charming zigzag V-stitch pattern. There’s something so satisfying about creating these little garments, and they truly make your Christmas tree feel extra special and personal.
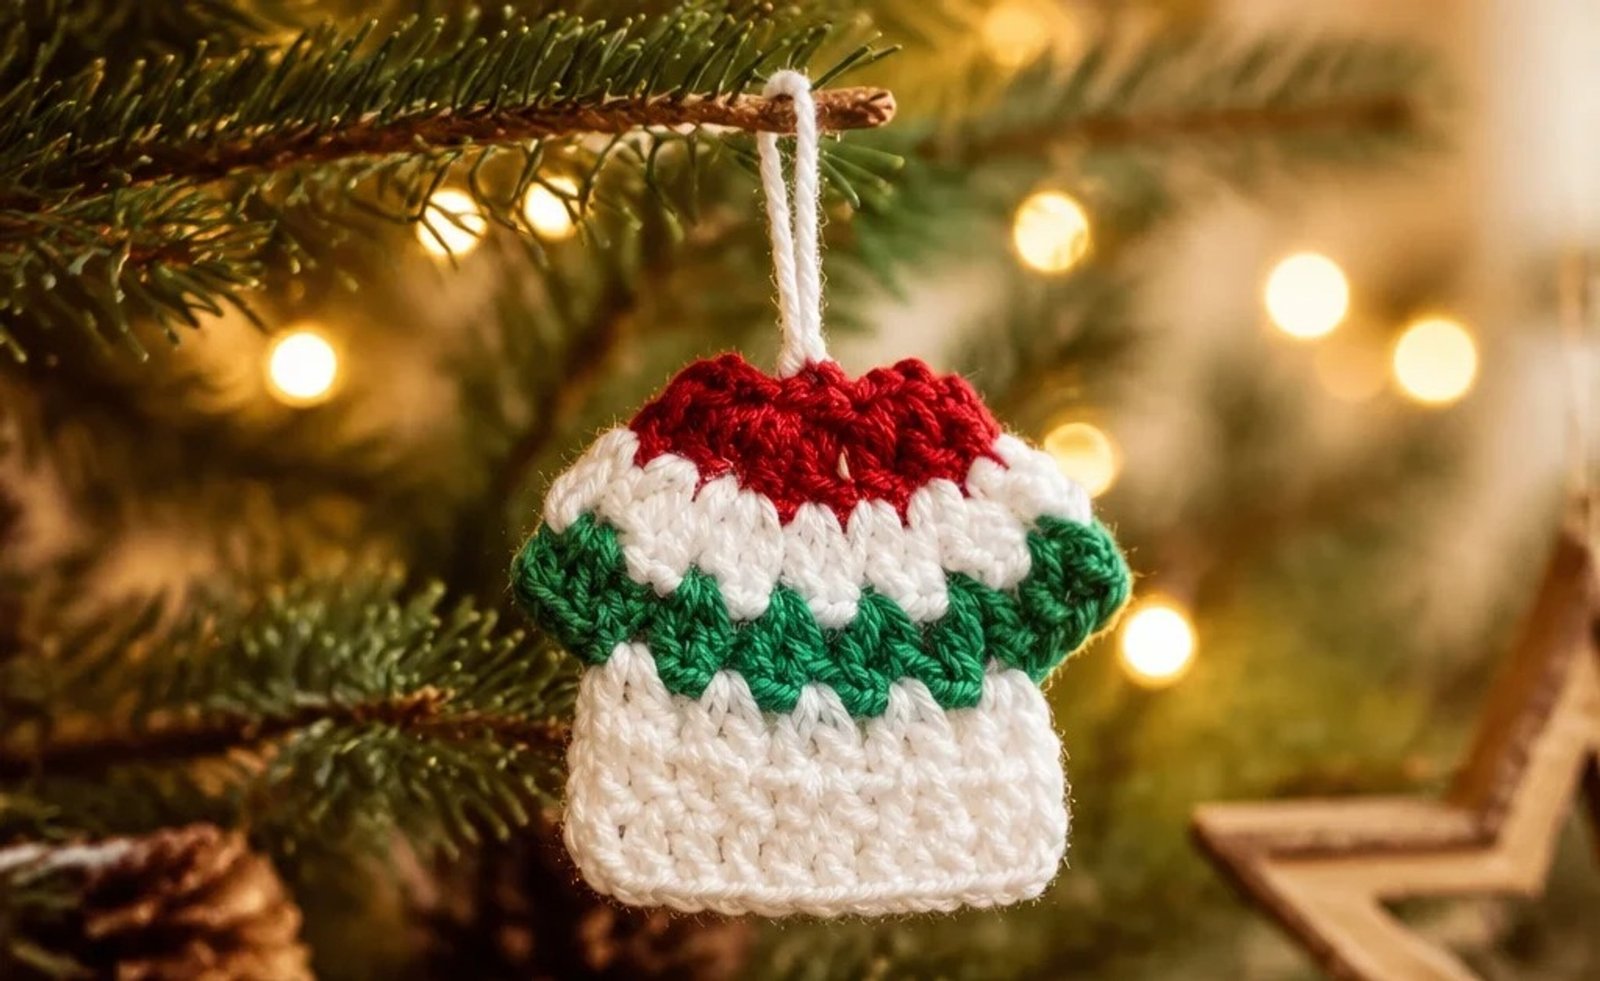
I absolutely adore how these tiny sweaters capture the essence of cozy holiday warmth. The classic red, white, and green palette is simply irresistible, reminding me of vintage Christmas cards. While I love the traditional look, these ornaments are also fantastic for experimenting with different color schemes—imagine them in Nordic-inspired navy and gold, or soft, modern pastels. They’re quick to make, so you can whip up a whole set in an afternoon, making them perfect for last-minute gifts or as charming additions to your own holiday display. Plus, they’re beginner-friendly, which means anyone can enjoy the magic of making these.
Crochet Christmas Tree Ornaments Crochet Pattern
Materials
- DK weight yarn in red, white, and green (or your chosen colors)
- 3.5mm crochet hook
- Tapestry needle
- Scissors
Finished Size
One size, miniature sweater ornament.
Hook and Tools
- 3.5mm crochet hook
- Tapestry needle
- Scissors
Abbreviations
- SC — Single Crochet
- DC — Double Crochet
- CH — Chain
- SL ST — Slip Stitch
- ST(s) — Stitch(es)
Pattern Notes
- The ornament is constructed in pieces (body and sleeves) and then assembled.
- The body is worked as a flat panel, with SC rows for the lower body and V-stitch for the yoke.
- Sleeves are worked separately and joined at the armhole.
- The pattern uses US crochet terms.
Special Stitches
- V-Stitch: Work (1 DC, CH 1, 1 DC) into the same stitch or space.
Instructions
Body Panel (Make 1):
Row 1: Using white yarn, CH 16. SC in the 2nd CH from hook and in each CH across. Turn. (15 SC)
Row 2-4: CH 1, SC in each ST across. Turn. (15 SC)
Row 5 (V-Stitch Row): Change to green yarn. CH 3 (counts as 1 DC), skip 1 ST, work V-Stitch in next ST, *skip 2 STs, work V-Stitch in next ST*. Repeat from * to * 3 more times. Skip 1 ST, DC in last ST. Turn. (5 V-stitches, 2 DC)
Row 6 (V-Stitch Row): CH 3 (counts as 1 DC), work V-Stitch in each CH-1 space of the V-stitches across. DC in the top of the beginning CH 3. Turn. (5 V-stitches, 2 DC)
Row 7: Change to white yarn. CH 1, SC in each ST and CH-1 space across. (15 SC)
Row 8 (Collar Ribbing): CH 1, SC in each ST across. Turn. (15 SC)
Row 9: CH 1, working in back loops only, SC in each ST across. Turn. (15 SC)
Row 10: CH 1, SC in each ST across. Fasten off, leaving a long tail for sewing.
Sleeves (Make 2):
Row 1: Using red yarn, CH 9. SC in the 2nd CH from hook and in each CH across. Turn. (8 SC)
Row 2-3: CH 1, SC in each ST across. Turn. (8 SC)
Row 4: Change to white yarn. CH 1, SC in each ST across. Turn. (8 SC)
Row 5-6: CH 1, SC in each ST across. Turn. (8 SC)
Row 7: CH 1, SC in each ST across. Fasten off, leaving a long tail for sewing.
Finishing
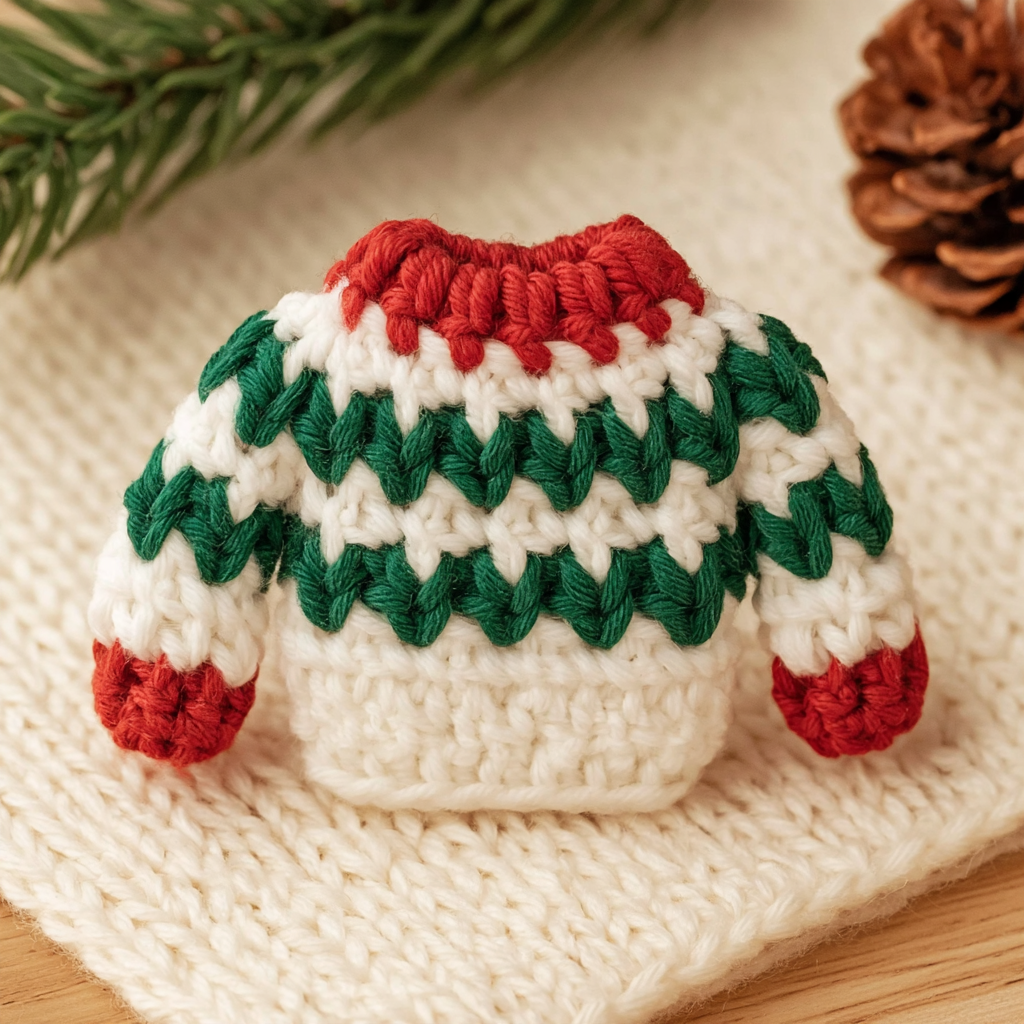
- Weave in all initial yarn ends.
- Fold the body panel in half lengthwise, right sides together.
- Using the long tail, seam the side edges of the body panel from the bottom up, leaving an opening at the top for the armholes (about 4-5 rows down from the collar).
- Fold each sleeve in half lengthwise, right sides together. Seam the side edges of each sleeve.
- Turn the body and sleeves right side out.
- Attach the sleeves to the armhole openings of the body panel using your tapestry needle and the remaining yarn tails.
- Weave in all remaining ends securely.
- Attach a loop of yarn to the top of the collar for hanging.
Emma’s Tips
Creating these tiny sweaters is such a delightful process! To make sure your V-stitches pop, try to keep your tension consistent, especially when changing colors. A smooth, tightly plied yarn really helps define those stitch details. Don’t be afraid to try different color combinations—these ornaments are a fantastic way to use up small bits of yarn from your stash. For a truly cohesive look, consider making a set of crochet baubles to complement your sweaters. And remember, a good tapestry needle is your best friend for weaving in all those ends neatly!
FAQ
- What kind of yarn is best for these ornaments?
DK weight yarn is ideal because it provides enough structure for the tiny sweater to hold its shape without being too stiff. A smooth acrylic or acrylic-cotton blend works well to showcase the stitch detail.
- Can I make these in different sizes?
This pattern is designed for a miniature ornament size. Resizing would require adjusting the initial chain count and subsequent row/round counts, which is not detailed in this specific pattern.
- How do I wash these ornaments?
If made with acrylic or an acrylic blend, you can gently hand wash them in cool water with a mild soap. Lay them flat on a clean towel, reshape while damp, and allow them to air dry completely before storing.
- How can I customize my ornaments?
You can experiment with different color combinations for the body, sleeves, and V-stitch bands. For a unique touch, consider adding small surface crochet details like snowflakes or tiny French knot buttons before assembly.