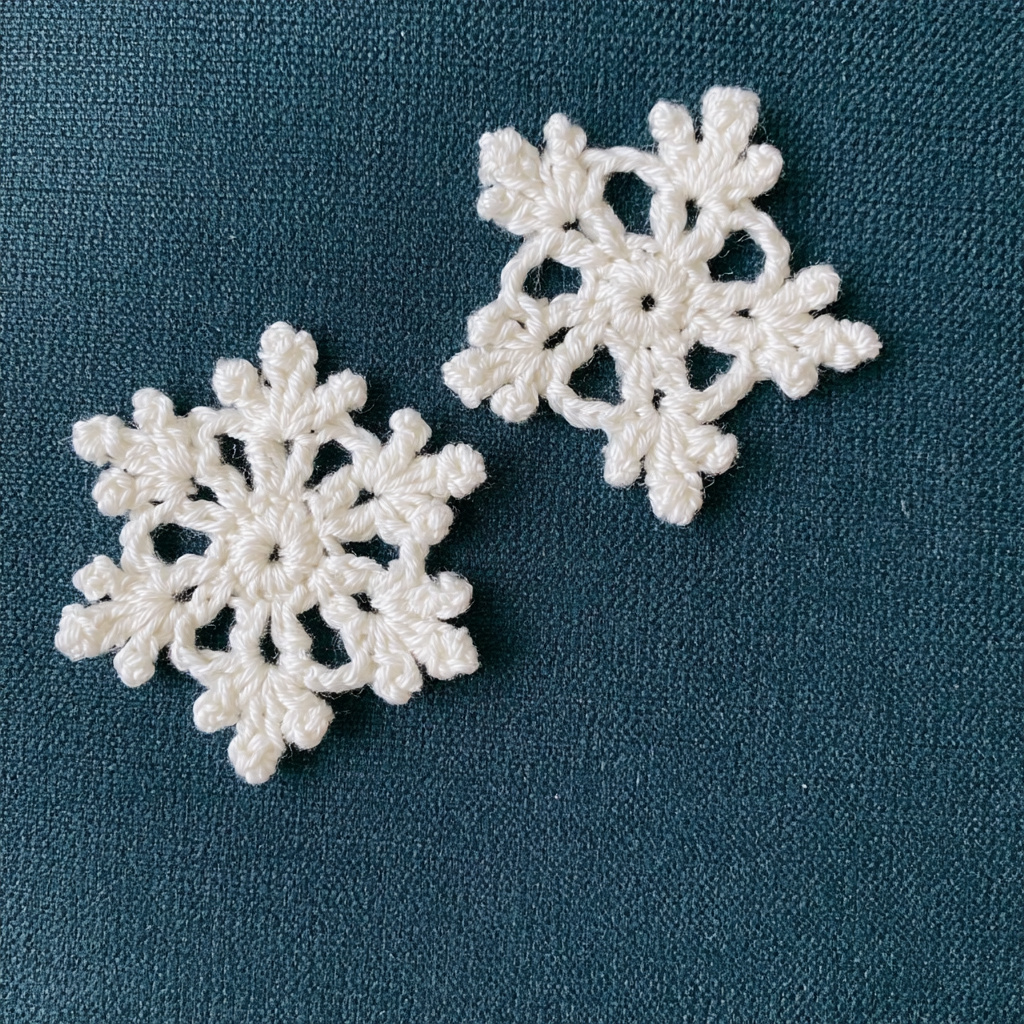
Hello, fellow crocheters! Emma here, and I’m so excited to share a truly enchanting project with you today: a delicate crochet snowflake. There’s something so magical about snowflakes, and being able to capture that beauty with yarn and a hook is just wonderful. This pattern is perfect for adding a touch of winter charm to your home, whether you hang them as ornaments, string them into a garland, or use them as unique gift toppers.
What I love most about this snowflake pattern is how quickly it works up. It’s incredibly satisfying to see the intricate design emerge with just a few rounds. Even if you’re new to crochet, you’ll find these instructions clear and easy to follow. It’s a fantastic way to practice your basic stitches while creating something truly beautiful. Let’s get started on your own little piece of winter wonder!
Crochet Snowflake Pattern
Materials
- Fine2 yarn in white
- 3.5mm or 3.75mm hook
- Marking Clip (stitch marker)
- Needle
- Scissors
Finished Size
The finished size was not provided in the source material.
Yarn Information
The pattern uses “Fine2 yarn in white.” No specific weight, fiber content, or yardage was provided.
Hook and Tools
- 3.5mm or 3.75mm crochet hook
- Marking Clip (stitch marker)
- Tapestry needle (for weaving in ends)
- Scissors
Abbreviations
- MR — Magic Ring
- Ch — Chain stitch
- Dc — Double crochet
- Sl.st — Slip Stitch
All patterns use US terminology.
Pattern Notes
- This snowflake is worked in rounds from the center out.
- A Marking Clip (stitch marker) can be helpful to mark the first stitch of each round, though for this pattern, the slip stitch to join is usually clear.
- The chain stitches at the beginning of rounds count as a stitch where indicated.
Instructions
To Begin: Create a Magic Ring (MR).
Round 1: MR, Ch 5 (counts as 1 Dc and Ch 2). [Dc, Ch 2] 5 times. Join with a Sl.st to the 3rd chain of the beginning Ch 5. (6 Dc, 6 Ch-2 spaces)
Round 2: Ch 3 (counts as 1 Dc). Work 3 Dc into the same Ch-2 space. Ch 2. *Work 4 Dc into the next Ch-2 space. Ch 2.* Repeat from * to * 5 more times. Join with a Sl.st to the top of the beginning Ch 3. (24 Dc, 6 Ch-2 spaces)
Round 3: [Sl.st into next 2 stitches, Sl.st into the next stitch, Ch 3, Sl.st into the next stitch, Ch 5, Sl.st into the next stitch, Ch 7, Sl.st into the next stitch, Ch 5, Sl.st into the next stitch, Ch 3, Sl.st into the next stitch] Repeat this entire sequence 6 times. Join with a Sl.st to the first Sl.st of the round. (6 snowflake points)
Finishing
Fasten off, cut your yarn, and weave in all loose ends using your tapestry needle. Gently block your snowflake to help define its points and shape.
A Few Tips From Emma
- Blocking is Key: For a crisp, defined snowflake, blocking is essential! After weaving in your ends, gently dampen your snowflake and pin it to a foam board, carefully shaping each point. Let it dry completely. This really makes the design pop.
- Yarn Choice Matters: While the pattern specifies “Fine2 yarn,” a fine weight yarn (like a #2 Sport weight) will give you a delicate, lacy snowflake. If you use a slightly thicker yarn, your snowflake will be larger and perhaps a bit more robust. Just remember that your hook size might need to adjust accordingly.
- Use Stitch Markers: Even for small projects, a stitch marker can be a lifesaver. Place one in the first stitch of each round if you tend to lose count, or to mark specific points as you work.
- Gift Ideas: These snowflakes make wonderful holiday gifts! Attach one to a present, use them as ornaments, or even string several together to create a festive garland. They’re also perfect for adding a handmade touch to your winter decor. For more seasonal ideas, check out these Crochet Delights: Patterns for Every Season & Celebration.
Pattern Check
In Round 3, the instruction “[Sl.st×2,Sl.st,Ch×3,Sl.st,Ch×5,Sl.st,Ch×7,Sl.st,Ch×5,Sl.st,Ch×3,Sl.st]×6” seems to imply a varying number of slip stitches before and between chain sections within each repeat. Based on standard snowflake construction, it’s more likely that the slip stitches are meant to be worked into specific stitches (e.g., the top of the double crochets or into chain spaces) to form the points, and the “Sl.st x2” at the start might indicate moving to a specific position. The provided instruction is a direct transcription of the source, but a crocheter might need to interpret the exact placement of the slip stitches for the best visual outcome of the snowflake points. Work the slip stitches in Round 3 to position the chain loops symmetrically around the points of your snowflake.