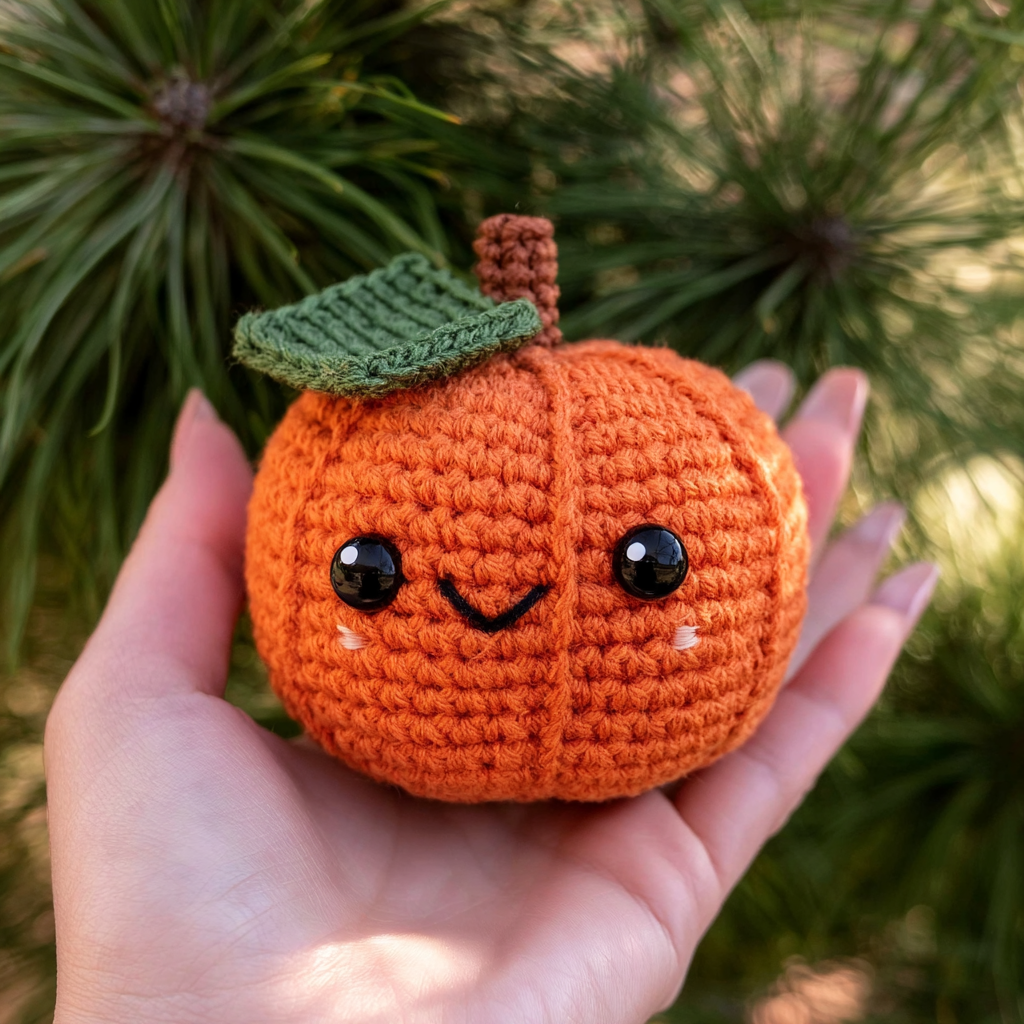
There’s something truly magical about autumn, isn’t there? The crisp air, the vibrant colors, and of course, all things pumpkin! I just adore bringing a touch of that seasonal charm into my home, and this little crochet pumpkin cutie is one of my favorite ways to do it. It perfectly captures those cozy fall feelings – like a walk through a pumpkin patch or the comforting scent of cinnamon from the kitchen.
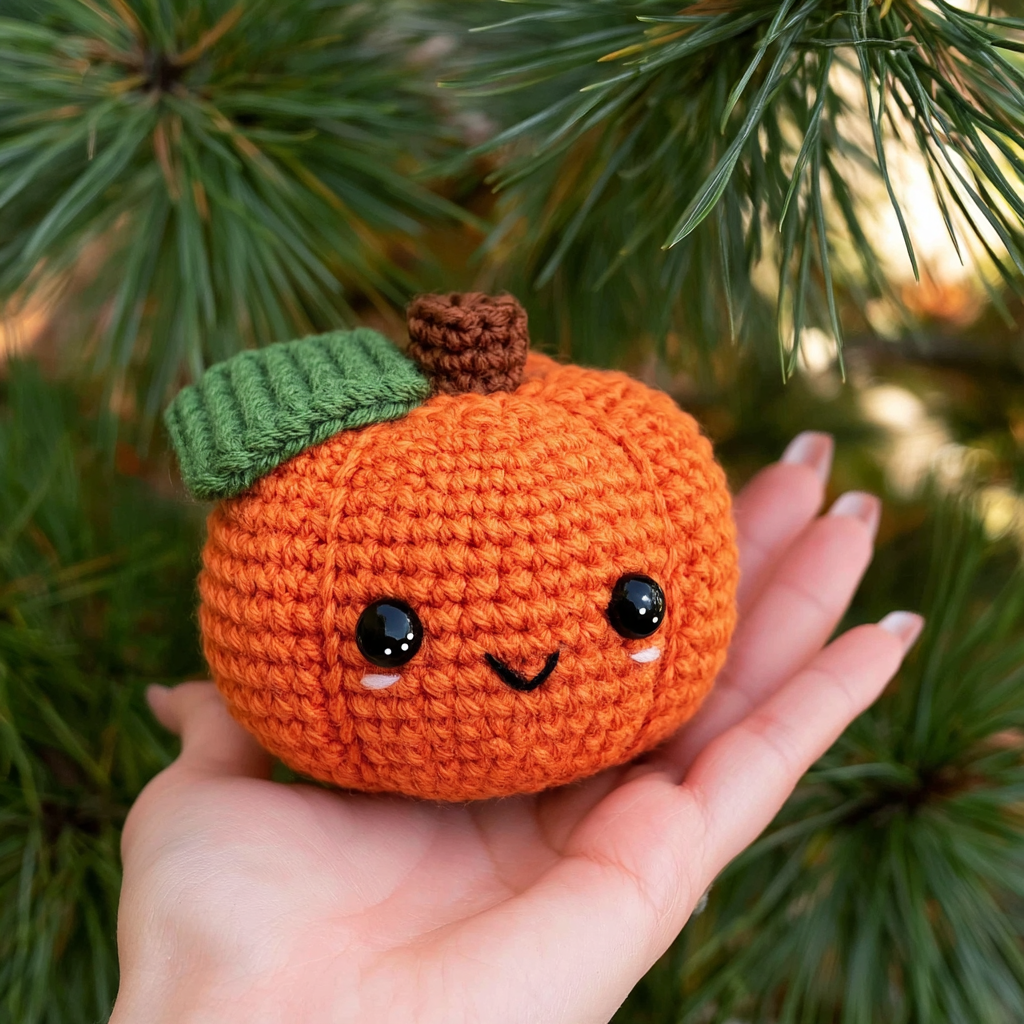
This isn’t just any pumpkin; it’s part of a special “Autumn Cuties” collection, and it’s so satisfying to create. While it’s rated intermediate, don’t let that deter you! The pattern introduces a clever cinching technique that gives the pumpkin its distinctive ridges, and I promise, once you get the hang of it, you’ll love the unique texture it creates. It’s worked in the round, and you’ll even get to add adorable embroidered facial features, making each pumpkin truly unique. It’s a wonderful project to cozy up with as the days get shorter.
Pumpkin Cutie Crochet Pattern
Materials
- Size H-8 (5 mm) crochet hook
- Medium (4) weight yarn in 3 colors:
- Yarn A – green (example uses Red Heart Super Saver: Medium Thyme)
- Yarn B – brown (Craft Smart Value: Espresso)
- Yarn C – orange (example uses Red Heart Super Saver: Carrot)
- 10 mm black safety eyes (x2)
- Black embroidery floss
- Pink embroidery floss (DMC 963 Light Dusty Rose) or pink yarn
- Polyester fiberfill
- Yarn needle
- Scissors
- Stitch markers
Color Variation 2 (as seen on the left in cover photo)
- Medium (4) weight yarn in 3 colors:
- Yarn A – green (example uses Red Heart Super Saver: Medium Thyme)
- Yarn B – brown (Craft Smart Value: Espresso)
- Yarn C – yellow (example uses Red Heart Super Saver: Gold)
Finished Size
3.5 inches (height) by 3.5 inches (width) by 3.5 inches (depth)
Hook and Tools
- Size H-8 (5 mm) crochet hook
- 10 mm black safety eyes (x2)
- Black embroidery floss
- Pink embroidery floss (DMC 963 Light Dusty Rose) or pink yarn
- Polyester fiberfill
- Yarn needle
- Scissors
- Stitch markers
Abbreviations (US Terminology)
- st (sts) — stitch (stitches)
- ch — chain stitch
- sl st — slip stitch
- sc — single crochet
- sc2tog — single crochet 2 together (over the span of 2 stitches), also known as a decrease
- hdc — half double crochet
- dc — double crochet
- sk — skip
- BLO — back loop only
Pattern Notes
- This pattern uses English (US) terminology.
- The pattern is written so that a number preceding an abbreviation denotes how many of that stitch are to be worked into the same stitch (e.g., 1sc = one single crochet, 2sc = two single crochet worked into one stitch, also known as an increase).
- This pattern is worked in the round, with each round joined at the end with a slip stitch. Unless otherwise instructed, the first stitch of your next round will always be worked into the same stitch as your joining slip stitch has been worked into.
- Always keep the ‘right side’ of your stitches facing outwards as you work. The right side is the front side of the stitch that is facing you as you are completing each stitch.
- This pattern uses a variation of the traditional single crochet stitch, sometimes referred to as the YU/YO (yarn under/yarn over) method. This method uses a yarn under technique on the first pass of each stitch. To do this, insert your hook into the next stitch, then yarn under. Pull through the stitch, then yarn over as normal and pull through both loops on your hook to complete your single crochet. This method is optional but highly recommended to minimize holes, improve shaping, and decrease stitch slanting.
- The next 18 rounds (Rounds 10-27) will be worked by alternating cinching rounds and regular rounds.
- When working the cinching (even) rounds, keep your chain sequences to the back and allow your single crochet rounds to bend forwards towards you.
- When working the regular (odd) rounds, pretend the previous cinching round does not exist. Work into the single crochets from your last regular round only. Therefore, when you reach a slip stitch from the previous cinching round, try to work over (not into) the slip stitches as if they were not there. Work your new stitch into the top of the single crochet from two rounds before, hiding the slip stitch inside your new stitch.
- Do not work over your chain sequences. Rather, allow them to float on the inside of your work. These chains will create pseudo-columns on the inside of your piece that you can stuff later.
Gauge
18 sc x 21 rows = 4 inches (using medium weight yarn, a size H-8 (5 mm) crochet hook, and the YU/YO method)
Instructions
Leaf
With Yarn A (green), chain 7.
Rnd 1: Beginning in 3rd ch from hook, 3dc into next st, 1dc into next st, 1hdc into next st, 1sc into next st, sl st into next st, ch 1, working into other side of ch sts, sl st into next st, 1sc into next st, 1hdc into next st, 1dc into next st, 3dc into next st, sl st into 1st st to join. (15 sts)
Fasten off and leave a tail for sewing. Weave in beginning tail, then set aside for now.
Pumpkin Stem
With Yarn B (brown), make a magic ring (or ch 4, sl st into 1st st to form ring, ch 1).
Rnd 1: 6sc into ring, sl st into 1st st to join, ch 1. (6 sts)
Rnd 2: 1sc into BLO of each st around, join, ch 1. (6 sts)
Rnd 3: 1sc into each st around, join, ch 1. (6 sts)
Rnd 4: 1sc into each st around, join, ch 1. (6 sts)
Rnd 5: [1sc into next st, 2sc into next st] 3 times, join. (9 sts)
Fasten off Yarn B and leave a short tail for tying. Join Yarn C (orange) by inserting your hook into the first stitch of the next round. Pull up a loop of Yarn C and chain 1. Tie the tails of both Yarn B and Yarn C together on the interior of your piece to secure your ends.
Pumpkin Body
Rnd 6: 2sc into each st around, join, ch 1. (18 sts)
Rnd 7: [1sc into next st, 2sc into next st] 9 times, join, ch 1. (27 sts)
Rnd 8: [2sc into next st, 1sc into each of next 2 sts] 9 times, join, ch 1. (36 sts)
Rnd 9: [1sc into each of next 3 sts, 2sc into next st] 9 times, do not join. (45 sts)
Secure your working loop with a stitch marker and follow the instructions for sewing on the leaf before continuing.
Sewing on the Leaf
Using the end tail leftover from fastening off the leaf, sew through the side of the pumpkin stem between rounds 4 and 5. Then, pass the needle back out through an adjacent stitch of the stem. Next, sew through the top of the last stitch of the leaf, then back into the stem again. Secure your sewing with a knot on the interior of your piece and trim any excess length.
Pumpkin Body (Continued)
Rnd 10: [sl st into next st, ch 5, sk next 8 sts] 5 times, join, ch 1. (30 sts)
Rnd 11: 1sc into each st from rnd 9 around, do not join. (45 sts)
Rnd 12: [sl st into next st, ch 5, sk next 8 sts] 5 times, join, ch 1. (30 sts)
Rnd 13: 1sc into each st from rnd 11 around, do not join. (45 sts)
Rnd 14: [sl st into next st, ch 5, sk next 8 sts] 5 times, join, ch 1. (30 sts)
Rnd 15: 1sc into each st from rnd 13 around, do not join. (45 sts)
Rnd 16: [sl st into next st, ch 5, sk next 8 sts] 5 times, join, ch 1. (30 sts)
Rnd 17: 1sc into each st from rnd 15 around, do not join. (45 sts)
Rnd 18: [sl st into next st, ch 5, sk next 8 sts] 5 times, join, ch 1. (30 sts)
Rnd 19: 1sc into each st from rnd 17 around, do not join. (45 sts)
Rnd 20: [sl st into next st, ch 5, sk next 8 sts] 5 times, join, ch 1. (30 sts)
Rnd 21: 1sc into each st from rnd 19 around, do not join. (45 sts)
Rnd 22: [sl st into next st, ch 5, sk next 8 sts] 5 times, join, ch 1. (30 sts)
Rnd 23: 1sc into each st from rnd 21 around, do not join. (45 sts)
Rnd 24: [sl st into next st, ch 5, sk next 8 sts] 5 times, join, ch 1. (30 sts)
Rnd 25: 1sc into each st from rnd 23 around, do not join. (45 sts)
Rnd 26: [sl st into next st, ch 5, sk next 8 sts] 5 times, join, ch 1. (30 sts)
Rnd 27: 1sc into each st from rnd 25 around, join, ch 1. (45 sts)
Secure your working loop with a stitch marker and follow the instructions for adding the eyes, mouth, and blush before continuing.
Finishing
Adding Facial Features
Do your best to avoid working over any of your chain sequences on the interior of your piece when adding facial features.
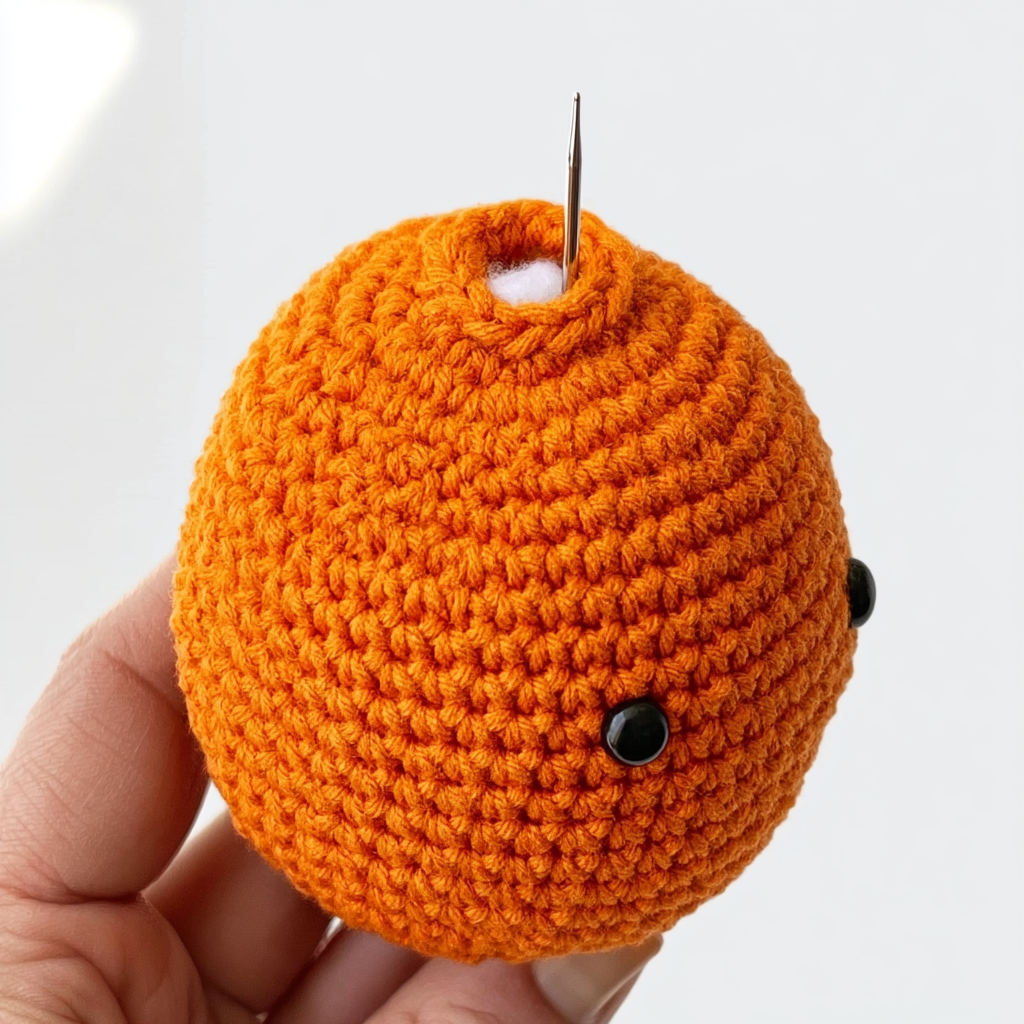
Safety Eyes: Insert both safety eyes through your piece (on a different side than your joining seam) so that one of the cinched grooves is centered between both eyes. The safety eyes should be inserted between Rounds 17 and 19 and should sit 6 stitches apart, from the center of one eye to the center of the other. (Remember to count your cinching rounds, even if they aren’t visible from the front!)
Mouth: Rotate your piece so that the beginning rounds face upwards and your last round faces downwards. Embroider a mouth using black embroidery floss over top of Round 21, centered between the eyes in the cinched groove. The mouth will be 2 stitches wide and 1 round tall.
- Insert your needle from inside to outside, 1 round down and 2 stitches to the right from where you’ve inserted the left eye. Pull through and leave some tail for tying later.
- Insert your needle again, 2 stitches to the right, and out again, 1 round down and 1 stitch to the left from where you’ve just inserted, and pull through.
- Pass your needle up and underneath the horizontal strand you’ve just created and pull through. Then, insert your needle back into the same space as you’ve last exited from.
- Pull your thread through and tug it down slightly until it forms a V-shape. Gently tie both ends together inside your piece. Take extra care not to pull the threads too tight! After finishing your knot, trim any excess length.
Blush: Embroider a blush line using pink embroidery floss or yarn next to each eye. Each blush line should start 1 round down (between Rounds 19 and 21) and 1 stitch outwards from where each eye was inserted, and span 1 stitch length outwards (away from the center of the face).
- Insert your needle from inside to outside, 1 round down and 1 stitch outwards from where you’ve inserted the eye. Pull through, leaving some tail inside for tying later. Then, insert your needle back in, 1 more stitch outwards.
- If using yarn, you may skip ahead to tying both ends together on the inside of your piece.
- If using embroidery floss, pass your needle back out through the same space as you’ve last exited from and pull through. Reinsert your needle, again, 1 stitch outwards in the same place as before.
- Repeat these last steps 3 more times, or until you are satisfied with the size of your blush. Then, gently tie both ends together on the inside of your piece. Take extra care not to pull the threads too tight! After finishing your knot, trim any excess length.
Stuffing and Closing
Continue to the next round and begin stuffing as you go. In addition to stuffing the center of the piece, lightly stuff each of the 5 columns created on the interior (between the exterior and the floating chain sequences), as well.
Rnd 28: [sc2tog over next 2 sts, 1sc into each of next 3 sts] 9 times, join, ch 1. (36 sts)
Rnd 29: [1sc into each of next 2 sts, sc2tog over next 2 sts] 9 times, join, ch 1. (27 sts)
Rnd 30: [sc2tog over next 2 sts, 1sc into next st] 9 times, join, ch 1. (18 sts)
Rnd 31: [sc2tog over next 2 sts] 9 times, join. (9 sts)
Fasten off and leave a tail for sewing closed. To sew the bottom hole closed, pass the needle, from front to back, through the front loop only of each stitch around and then pull tight. Secure your sewing with a knot, trim the tail, and sew in any remaining length.
Emma’s Tips
This pattern has a wonderful way of creating those classic pumpkin ridges with the cinching rounds. It might feel a little unusual at first, but stick with it – the result is so charming! When you’re adding the safety eyes and embroidering the face, take your time and use your stitch markers to help you line things up. Small details really make a difference in amigurumi. Don’t forget to generously stuff your pumpkin, especially those inner columns, to give it a nice plump shape. This little pumpkin makes a fantastic gift or a sweet addition to your own fall decor, perhaps sitting next to a Crochet Star Coaster!
FAQ
Here are some frequently asked questions about making your Crochet Pumpkin Cutie:
- What does the YU/YO method mean? The YU/YO (yarn under/yarn over) method is a variation of single crochet where you yarn under on the first pass of the stitch instead of yarning over. This creates a tighter fabric, which is great for amigurumi as it minimizes holes.
- Why are some rounds called “cinching rounds”? The cinching rounds use slip stitches and chains to create the indentations that give the pumpkin its characteristic ribbed shape. This technique helps define the pumpkin’s form.
- How do I ensure my facial features are centered? Use stitch markers to mark your desired placement before inserting safety eyes or beginning embroidery. This helps visualize the layout and ensures everything is symmetrical.
- Can I use a different yarn weight or hook size? You can certainly experiment with different yarn weights and hook sizes to make larger or smaller pumpkins. Just be aware that this will change the finished dimensions and possibly the overall look.